How-to: CBX Gauge restoration - tips, techniques, suppliers, tutorial


User avatar
NobleHops
ICOA Member
ICOA Member
Posts: 3872
Joined: Mon Jan 25, 2010 7:17 am
Location: Tucson, Arizona, USA

How-to: CBX Gauge restoration - tips, techniques, suppliers, tutorial

Post by NobleHops »

This may take twice as long to write up and post as it did to do it today but here's a tutorial on how I converted a set of super nice Prolink gauges for use on my 1980 "Bitsa Bike" project. This will cover pretty much every skill and supplier that a restoration project would, so I hope it's useful for both projects.

This is my patient - a super nice, pretty much unused set of gauges from a 81-82 Honda CBX "Prolink". I can't for the life of me recall who it was that more or less gifted these to me, but I have been hoarding them for several years. Similar to the 1980 bike I am working with, the Prolink CBX also had the curious 80 MPH speedometer of the early 80s, making this set an excellent candidate for conversion to use on my 1980 "Bitsa Bike" project, where I am taking an assemblage of parts I have collected and hoarded for several years and building a mild custom CBX from them.

That project can be found here http://www.cbxclub.com/forum/viewtopic. ... 02&t=12146 on this forum.

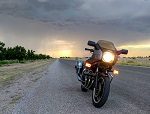
Here's that bike as I tore into this project today. It's substantially together, and I am completing the wiring now before installing the carburetors and uprighting the engine.

Image

...and here are the excellent hoarded gauges:

Image

There are a couple of issues that prevent me from using these gauges as is - the main one is that in 1981 Honda switched over to a more compact size of the Sumitomo connectors they had used throughout the early years of the DOHCs and so these won't plug into my bike's wiring.

Image

I suppose I could have got freaky and crimped different spades and new plugs to adapt it to my wiring harness and created a one-off, but that did not appeal to me, and I also wanted to reset the mileage to something close to what I understand engine has on it and do away with the "RR SUSP AIR PRESS" idiot light, as that was not used on the twin-shock bikes. Plus, the gauge cushions are about worn out after 40 years, and that puts the gauges themselves at risk from vibration damage. So I'm going in.

Image
Nils Menten
Tucson, Arizona, USA '80 CBX, sort-of restored :-)

User avatar
NobleHops
ICOA Member
ICOA Member
Posts: 3872
Joined: Mon Jan 25, 2010 7:17 am
Location: Tucson, Arizona, USA

Re: How-to: CBX Gauge restoration - tips, techniques, suppliers, tutorial

Post by NobleHops »

Now I'm gathering up odds and ends that I need, parts I previously purchased and hoarded, plus refurbished parts scavenged from some of the projects we worked on over the years. The "mouse ears" at the back I refer to as the "bezel", and the housing the gauges sit in I call the "surround". The wiring harness at the upper right was harvested from a set of twin-shock gauges, has everything we need to connect to our twin-shock wiring harness, and the white thing lower right I call the "tub" that houses the bulbs for the idiot lights in the bezel. There are also some repro parts visible, we'll go into those shortly, plus some new Honda gauge cushions, as most of these 40-year-old gauges are sitting on old cushions that are crumbling and hard, and that's contributing to the demise of these old delicate instruments.

Image

Here's the tub up close - this holds the correct twin-shock wiring harness connectors we need.

Image

...and here's the wiring harness we need to swap in, with those larger connectors.

Image

This is NOT a CBX part it's for a Sabre, but it fits the voltmeter. Thanks, brother Phil Taber!

Image

These are gauge cushions - strictly speaking, these are for the speedo, but it's all Honda sells anymore, and it works fine for the tachometer too.

Image

These are new crimp rings, idiot light lenses, and awesome reproduction gauge face plates, although the set seen is for a '79. Those faceplates are translucent and can actually be read at night, unlike the stock opaque face plates. Superior reproduction parts, but we're not using them for this project.

Image

Those face plates and the reproduction idiot light lenses were produced and are sold by a guy named Marcel Den Butter, in Holland. You can find those on his website here: https://www.cb750faces.com/en/

Our friend Bob Franzke also sells these items here in the USA on his site:

https://cbxperformance.com/products

Bob also offers this restoration work as a service through his website.
Nils Menten
Tucson, Arizona, USA '80 CBX, sort-of restored :-)

User avatar
NobleHops
ICOA Member
ICOA Member
Posts: 3872
Joined: Mon Jan 25, 2010 7:17 am
Location: Tucson, Arizona, USA

Re: How-to: CBX Gauge restoration - tips, techniques, suppliers, tutorial

Post by NobleHops »

This is the bezel I'm going to use. Was already blasted and powdercoated, and is straight.

Image

One last look before I tear these apart. Courage!

Image

Flip them over and. you can see the smaller connectors, and the surround opening for the connectors is smaller too - we're going to need to swap in a twin-shock surround.

Image

Image

We're going to need to get that tripmeter knob off pretty shortly, and for that we need really high-quality mini JIS crosshead screwdrivers. NOTE: This style of tripmeter know with the screw down the end was found on all the Prolink bikes I have seen and a few of the twin-shock bikes, but I do not know where or if there was a cutoff. There is another style of reset knob that is reverse-threaded onto the shaft, you simply turn it in the opposite direction of the way you’d use it to reset the tripmeter, and if you are lucky that spins it off easily, If you are unlucky, you are in for a fight getting it off. The telltale is simply the hole in the end of the knob; if you have a hole, then it uses the screw within. No hole; it’s reverse-threaded onto the shaft.

Image

Feel down in the end of the knob and feel for the crosshead screw, without mangling it, hopefully.

Image

Once it's located and loose, remove it and the grommet from the speedometer. The screw can stay where it is, thankyouverymuch.

Image

Pop the 4 black cap nuts and washers from the T-shaped grommets on the shafts, wiggle the grommets out...

Image

...and remove the surround.

Image

Image

Unmolested:

Image
Nils Menten
Tucson, Arizona, USA '80 CBX, sort-of restored :-)

User avatar
NobleHops
ICOA Member
ICOA Member
Posts: 3872
Joined: Mon Jan 25, 2010 7:17 am
Location: Tucson, Arizona, USA

Re: How-to: CBX Gauge restoration - tips, techniques, suppliers, tutorial

Post by NobleHops »

Here's the back of our speedometer. That little wiring harness is a Prolink thing, and works with the module that decides if it should alert you about the low rear shock air pressure. It's not used on the 80, and so we just leave it disconnected; no harm done doing that.

Image

Image

...and there's our tachometer.

Image

Curiously the tachometer was missing a bulb!

Image

The rubber bulb sockets just wiggle out, although after 40 years they will feel a little welded in. Patience.

Image

That's our lamp for the voltmeter, and I take photos like this for wiring reference and routing too.

Image

With the wiring and the lamps removed the bezel just lifts off of the instruments now. Haven't loosened the voltmeter yet.

Image

These trim rings rest between the gauge crimp ring and the gauge cushion, and beware because the rear edge is razor sharp; ask me how I know. Take note of the perfectly smooth surface where the black crimp ring is. We're going to try to replicate that, so the trim rings sit flat when we reassemble.

Image

Image

Peel back that wiring bundle and the terminals and nuts holding the voltmeter are exposed and can be removed. Notice that the gauge cushions are shrinking and getting punky looking. The tachometer is worse than the speedo, but we're going to replace both.

Image
Nils Menten
Tucson, Arizona, USA '80 CBX, sort-of restored :-)

User avatar
NobleHops
ICOA Member
ICOA Member
Posts: 3872
Joined: Mon Jan 25, 2010 7:17 am
Location: Tucson, Arizona, USA

Re: How-to: CBX Gauge restoration - tips, techniques, suppliers, tutorial

Post by NobleHops »

Lift the Prolink tub and wiring off, scavenge the near-new bulbs out of them, and set aside - we're replacing all this with twin-shock parts.

Image

Could have reused this, definitely. Would only have had to press out the red air pressure lens and glue in a black dummy, replace the cushions, and maybe the idiot light gaskets. But it was a little scuffy up front, so we'll just set it aside for a rainy day.

Image

Not the worst we've seen!

Image

Image

Nice refinished bezel:

Image

Self-adhesive idiot light gaskets, adds a little cushion to the assembly and seals the different areas in the tub from light leakage to each other. Great part, from our friend Cary Knapton of The Supersport Shed, in the UK: https://thesupersportshed.com/

Image

Peel...

Image

and stick:

Image

Image

New idiot light lenses from Marcel:

Image

Thicker, gap-filling CA glue is much easier to control precisely:

Image

A wee puddle on an old piston and a toothpick will make this easier to do.

Image

A little shave of the lens edges to make them cleaner:

Image

Teeny bead of the CA glue. A little is enough.

Image

Steady...

Image

...and done,

Image

This is drying out, looks punky.

Image

Better:

Image

New Honda gauge cushions:

Image

Done with that!

Image

Twin-shock tub has the correct slots to hold the wiring connectors. This was all ultrasonic cleaned and sprayed with deoxit.

Image

Little dollop of dielectric grease for reassembly of the bulb sockets.

Image

Image

A little smear on the bulb base and another on the rubber - a little is all we need to make these pretty impervious to corrosion and easy to remove down the road.

Image

Voltmeter and tub installed with the wiring harness, reconnecting the wiring. The photos will give us color reference if we need it.

Image

OK, that's all the easy stuff, can't stall any longer, time to crack into that speedometer.

Image

Image
Nils Menten
Tucson, Arizona, USA '80 CBX, sort-of restored :-)

User avatar
NobleHops
ICOA Member
ICOA Member
Posts: 3872
Joined: Mon Jan 25, 2010 7:17 am
Location: Tucson, Arizona, USA

Re: How-to: CBX Gauge restoration - tips, techniques, suppliers, tutorial

Post by NobleHops »

Step 1, go grab half of your flat-head screwdrivers, one of these is going to be perfect for what comes next.


Image

Step 2, drink a shot of this or something similar, and grant yourself patience:

Image

This is a bodged-together hose clamp set that's handy

Image

Place this like so and you'll be less likely to crack or break the brittle plastic body of the speedometer as you pry up that crimp ring.

Image

Now we have to get under that edge and pry up that crimp ring, 1/8 of an inch at a time. over 2-3 passes around the entire gauge. Yup.

Image

Image

It does not need to be 90-degrees pried up, at some point you can screw up your courage and pry the gauge out of there.

Image

Home free here...

Image

Presto!

Image

Hat tip to the inimitable Pete Rose of Digital Pizza for the recommendation for this tool. This is an oxygen sensor remover or something, and you can see I buzzed-off a piece of it that was in the way for our purposes. Pete's website is a treasure trove of info about the CBX, among other things: https://www.digitalpizza.com/

Image

We need to use this tool to get under that speedo needle base and pry it off of the stem without breaking it. I have broken these, and when that happens you are F'ed. Courage!

Remove the two screws holding the face plate in...

Image

I rotate the face plate before removing the needle to see where the needle comes to rest without the stop to hold it, then make a little mark on the edge as shown to mark where I'll press it on during reinstallation.

Image

...and then pull off the needle with the tool. Whew!

Image
Nils Menten
Tucson, Arizona, USA '80 CBX, sort-of restored :-)

User avatar
NobleHops
ICOA Member
ICOA Member
Posts: 3872
Joined: Mon Jan 25, 2010 7:17 am
Location: Tucson, Arizona, USA

Re: How-to: CBX Gauge restoration - tips, techniques, suppliers, tutorial

Post by NobleHops »

Now we're all the way in, and we can either replace the face plates if we're just restoring these, or in this case, we can reset the odometer to what we want for this project.

Image

Hat tip here to Dave Wigston for this tip, to rotate the odometer dials you simply insert the tip of a utility knife blade in between the rollers, spread them very slightly by twisting the blade a skosh, and then rotate the dial numerically upward to change the reading. You're best off starting at the lower digits and working up to the high, not as shown.

Image

Presto, that's what we wanted. Our Bitsa Bike is nearly a nut and bolt restomod, but the engine we're using was removed from a good-running bike that was crashed with 21,000 miles on it, 15 or more years ago. For that reason, we registered the bike as having 21,000 miles and wanted a speedometer to agree with that. That seemed like the most honest and straightforward way to represent the bike's condition for future owners.

Image

Assembly is the reverse of disassembly. Rotate the faceplate as prior so we can install the needle pointing at that mark:

Image

Not shown: Press the needle on, holding the tip of your tongue out the RIGHT corner of your mouth. Good luck. Rotate the faceplate into position, install the screws, try and clean off the worst of the scuffies and fingerprints from the faceplate as best you can.

Image

Yes, I tried to clean off that discoloration from the tenths dials. Nothing doing.

It's going to be a lot easier to reassemble the gauge if you take some flat-nose lineman's pliers and straighten out half of the crimp ring to nearly 90 degrees as seen.

Image

CLEAN THE INSIDE OF THE LENS. That's an anti-glare convex plastic lens, and so Plexus is about perfect for cleaning and polishing it and leaving it less static-ey. Blow it out with compressed air, there's dust in there that can make you crazy.

Image

Insert the flat lip into the less-raised section, and it will drop into the other half pretty easily.

Image

Image
Nils Menten
Tucson, Arizona, USA '80 CBX, sort-of restored :-)

User avatar
NobleHops
ICOA Member
ICOA Member
Posts: 3872
Joined: Mon Jan 25, 2010 7:17 am
Location: Tucson, Arizona, USA

Re: How-to: CBX Gauge restoration - tips, techniques, suppliers, tutorial

Post by NobleHops »

Now we have to re-crimp that ring, getting it as flat and smooth as we can, so the trim ring will sit flat against it. I'm using a punch, starting on the area I raised up to nearly 90 degrees, one revolution to get it halfway bent back, and a second to tap it all the way down. Patience, grasshopper! Make two full revolutions around, one punch-width at a time and then test the trim ring against the crimp ring and tap down the remaining high spots.

Image

Image

Hey, you're done.

Image

Slip the speedo into the bezel and install the tripmeter reset knob and its grommet as seen, tighten the teeny screw and don't overdo that.

Image

Image

Tidy up the wiring bundles as you're able...

Image

Comparing the two surrounds - twin-shock with the larger aperture for the connectors is at the top:

Image

Install the surround - you may need to fiddle-rotate the gauges a degree or two to get everything lined up perfectly:

Image

Install the T-grommets, washers and cap nuts. You're done!

Image

Connect it up to the bike's wiring and test everything: Gauge lights, oil light, neutral light, high beam, turnsignals. Good to go!

Image
Nils Menten
Tucson, Arizona, USA '80 CBX, sort-of restored :-)

Rick Pope
ICOA Rally Director
ICOA Rally Director
Posts: 2275
Joined: Wed Sep 03, 2003 3:16 pm
Location: Lawrencburg, IN
Location: Lawrenceburg, Indiana

Re: How-to: CBX Gauge restoration - tips, techniques, suppliers, tutorial

Post by Rick Pope »

Thanks for doing this. That's a great documentation.
Rick Pope
Either garage is too small or we have too many bikes. Or Momma's car needs to go outside.

Larry Zimmer
ICOA Web Post/Pix/Video Archive Mgt
Posts: 2206
Joined: Mon Dec 15, 2003 2:32 pm
Location: Brighton, MI
Location: Brighton, Mich
Contact:

Re: How-to: CBX Gauge restoration - tips, techniques, suppliers, tutorial

Post by Larry Zimmer »

A GREAT 'How To'. Thanks, Nils. Obviously, much can be applied to any gage work.
Larry Zimmer
cbxlarry@sbcglobal.net

User avatar
NobleHops
ICOA Member
ICOA Member
Posts: 3872
Joined: Mon Jan 25, 2010 7:17 am
Location: Tucson, Arizona, USA

Re: How-to: CBX Gauge restoration - tips, techniques, suppliers, tutorial

Post by NobleHops »

Thank you, fellas!
Nils Menten
Tucson, Arizona, USA '80 CBX, sort-of restored :-)

Artie
ICOA Member
ICOA Member
Posts: 171
Joined: Tue Oct 15, 2013 4:35 pm
Location: Medford Ma

Re: How-to: CBX Gauge restoration - tips, techniques, suppliers, tutorial

Post by Artie »

Great tutorial it will be my guide for I’ve got 2 sets to do …patience,patience very important for sure thanx so much

steve murdoch icoa #5322
ICOA Member
ICOA Member
Posts: 4074
Joined: Tue Mar 04, 2003 9:12 am
Location: St. Catharines, On. Canada

Re: How-to: CBX Gauge restoration - tips, techniques, suppliers, tutorial

Post by steve murdoch icoa #5322 »

Another winter project to add to the list.
Thanks for the great tutorial, Nils.

User avatar
sixpiny0da
Forum Regular
Forum Regular
Posts: 30
Joined: Sat Apr 09, 2022 2:03 pm
Location: Sun City, AZ

Re: How-to: CBX Gauge restoration - tips, techniques, suppliers, tutorial

Post by sixpiny0da »

Thank you. You know I will be using this!

User avatar
portalespeanut
ICOA Member
ICOA Member
Posts: 50
Joined: Wed Aug 31, 2016 5:25 pm
Location: Roswell, New Mexico

Re: How-to: CBX Gauge restoration - tips, techniques, suppliers, tutorial

Post by portalespeanut »

Nils....great write up! And just in time, as I'm looking at digging into my '81 gauges. On my last ride, my speedometer began to squawk terribly, sending the needle jumping. AND on top of that, before the day was over, something went flying by my face...and I realized moments later it was the Right Turn Signal lens...crazy! On this project, did You do anything to lubricate the speedo?
You begin cutting your wisdom teeth the first time you bite off more than you can chew...

Post Reply

Return to “RESTORATIONS: Tips, How To's & What Not to Do. Parts, Decals, Painters, Paint Codes, Painting Tips.....More”